See It in Action
Embed a live hatch chart on your site and manage everything from your IdentaFly dashboard.
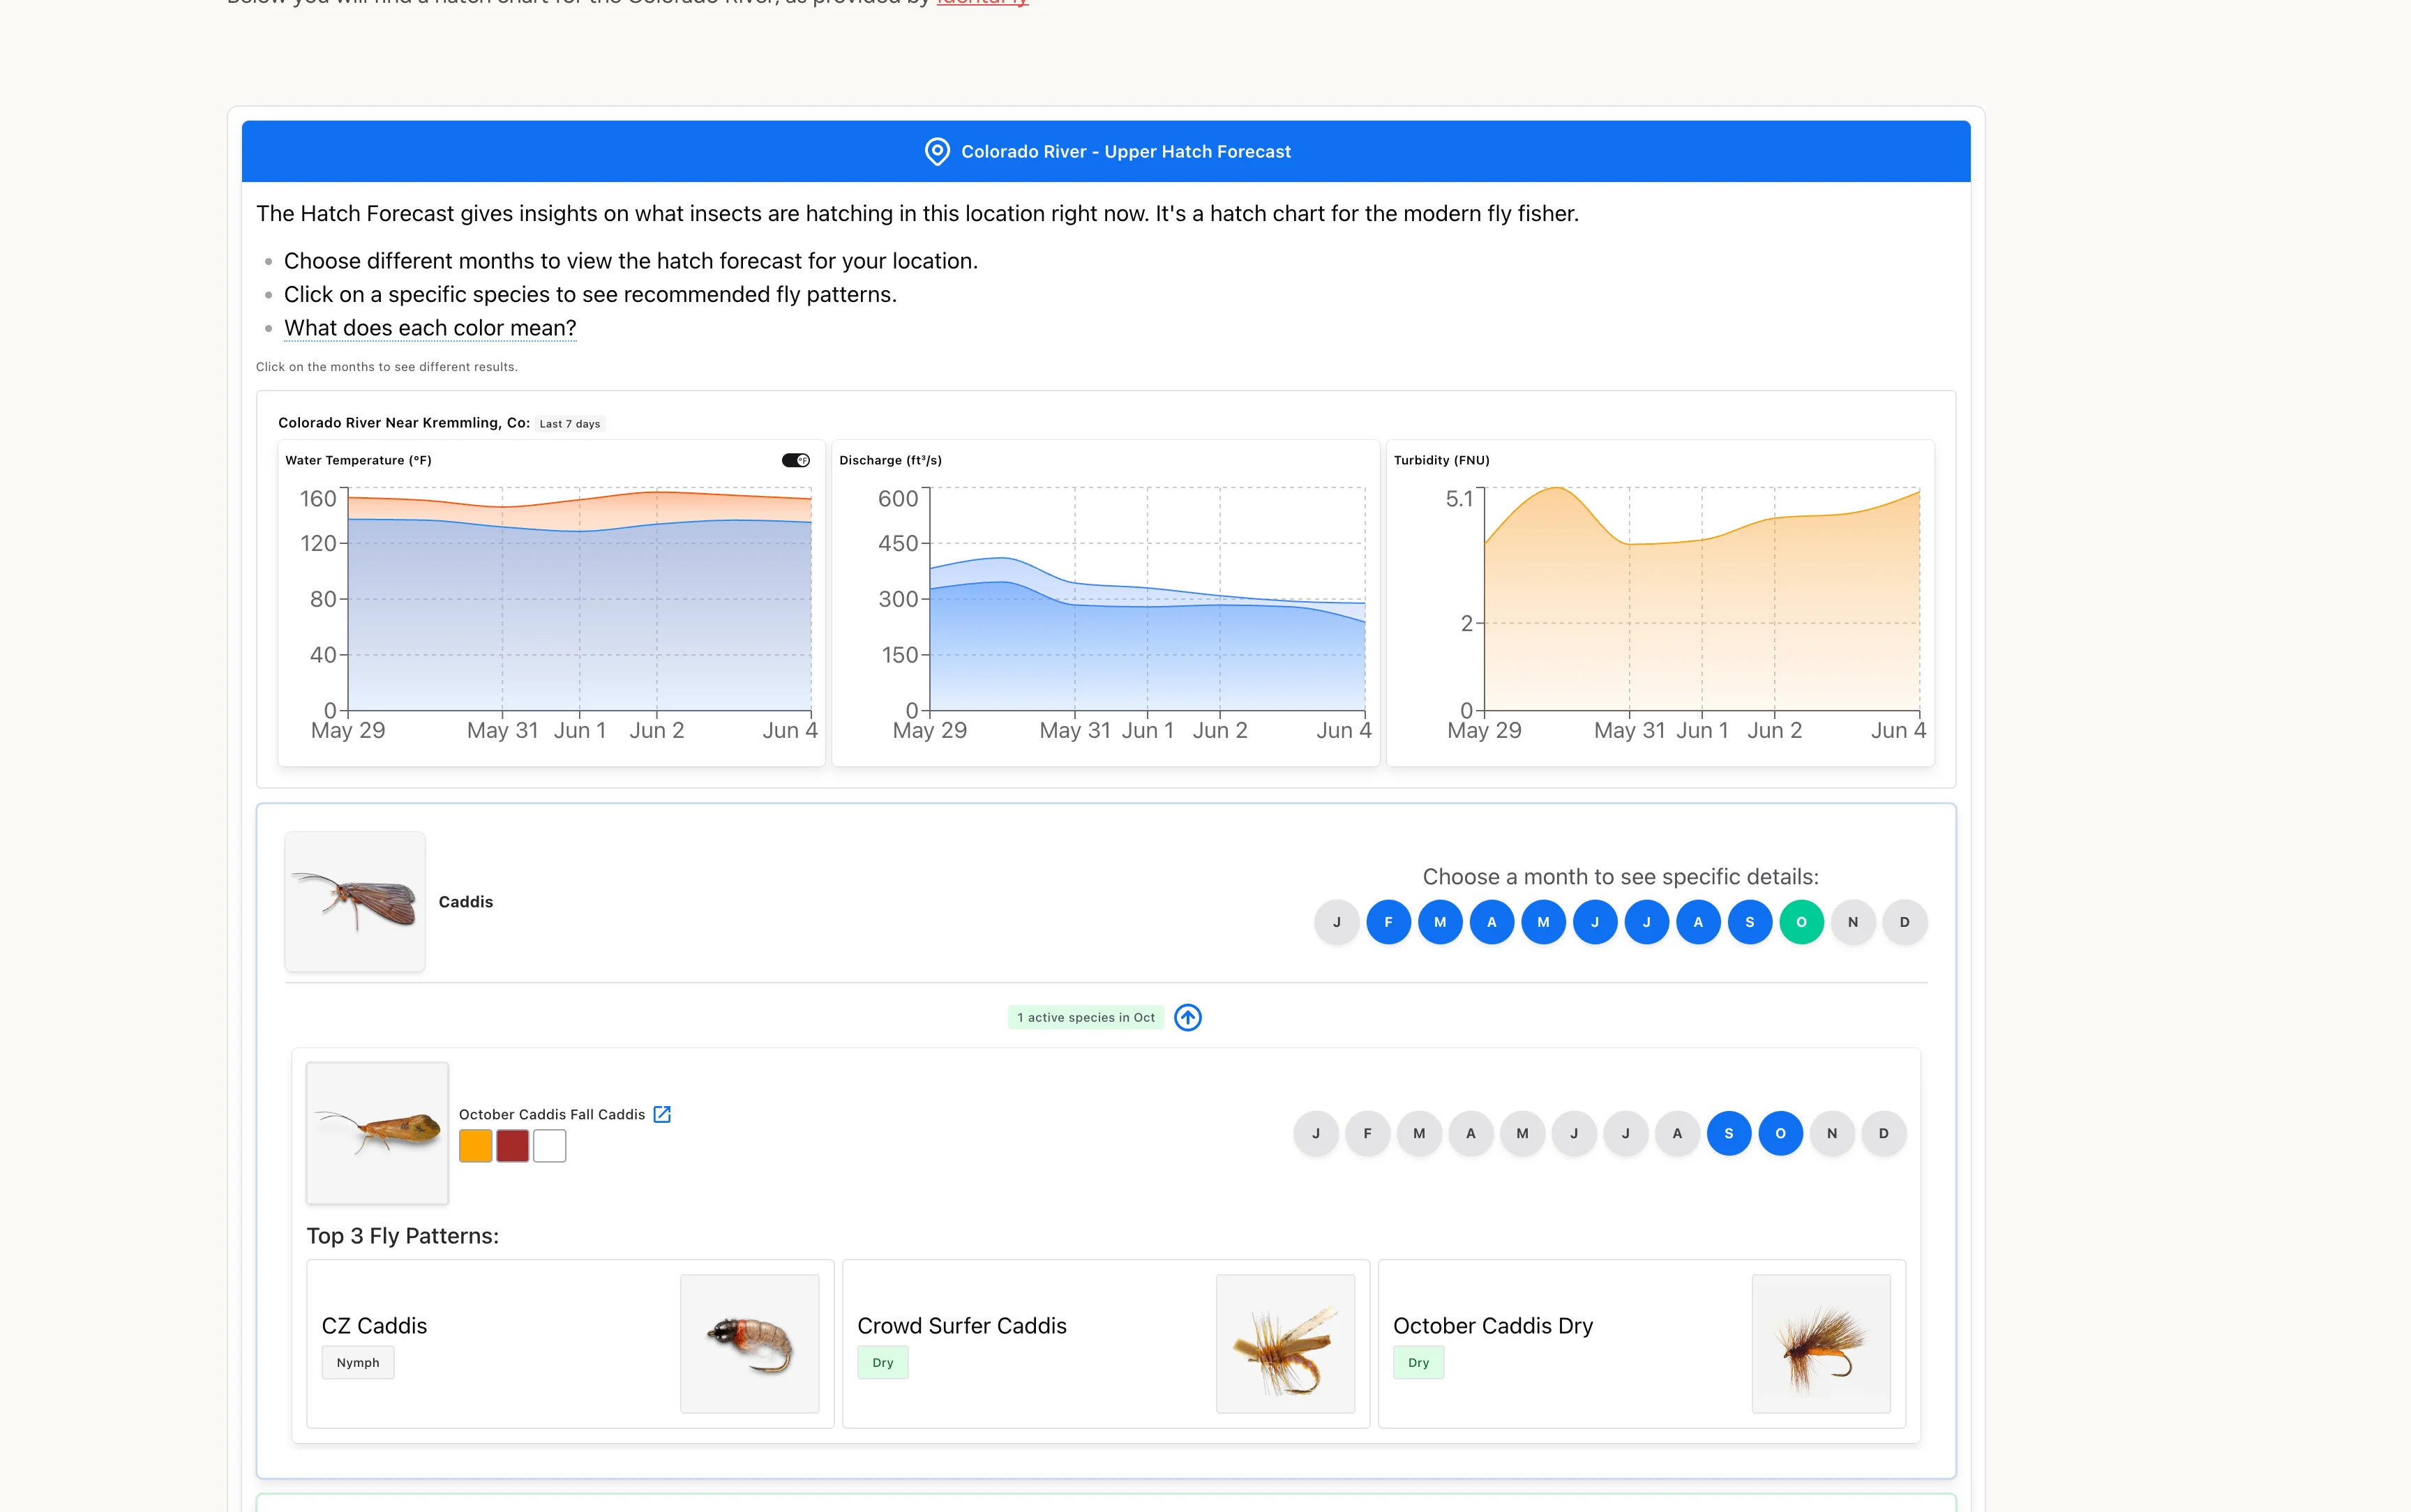
Live on your site
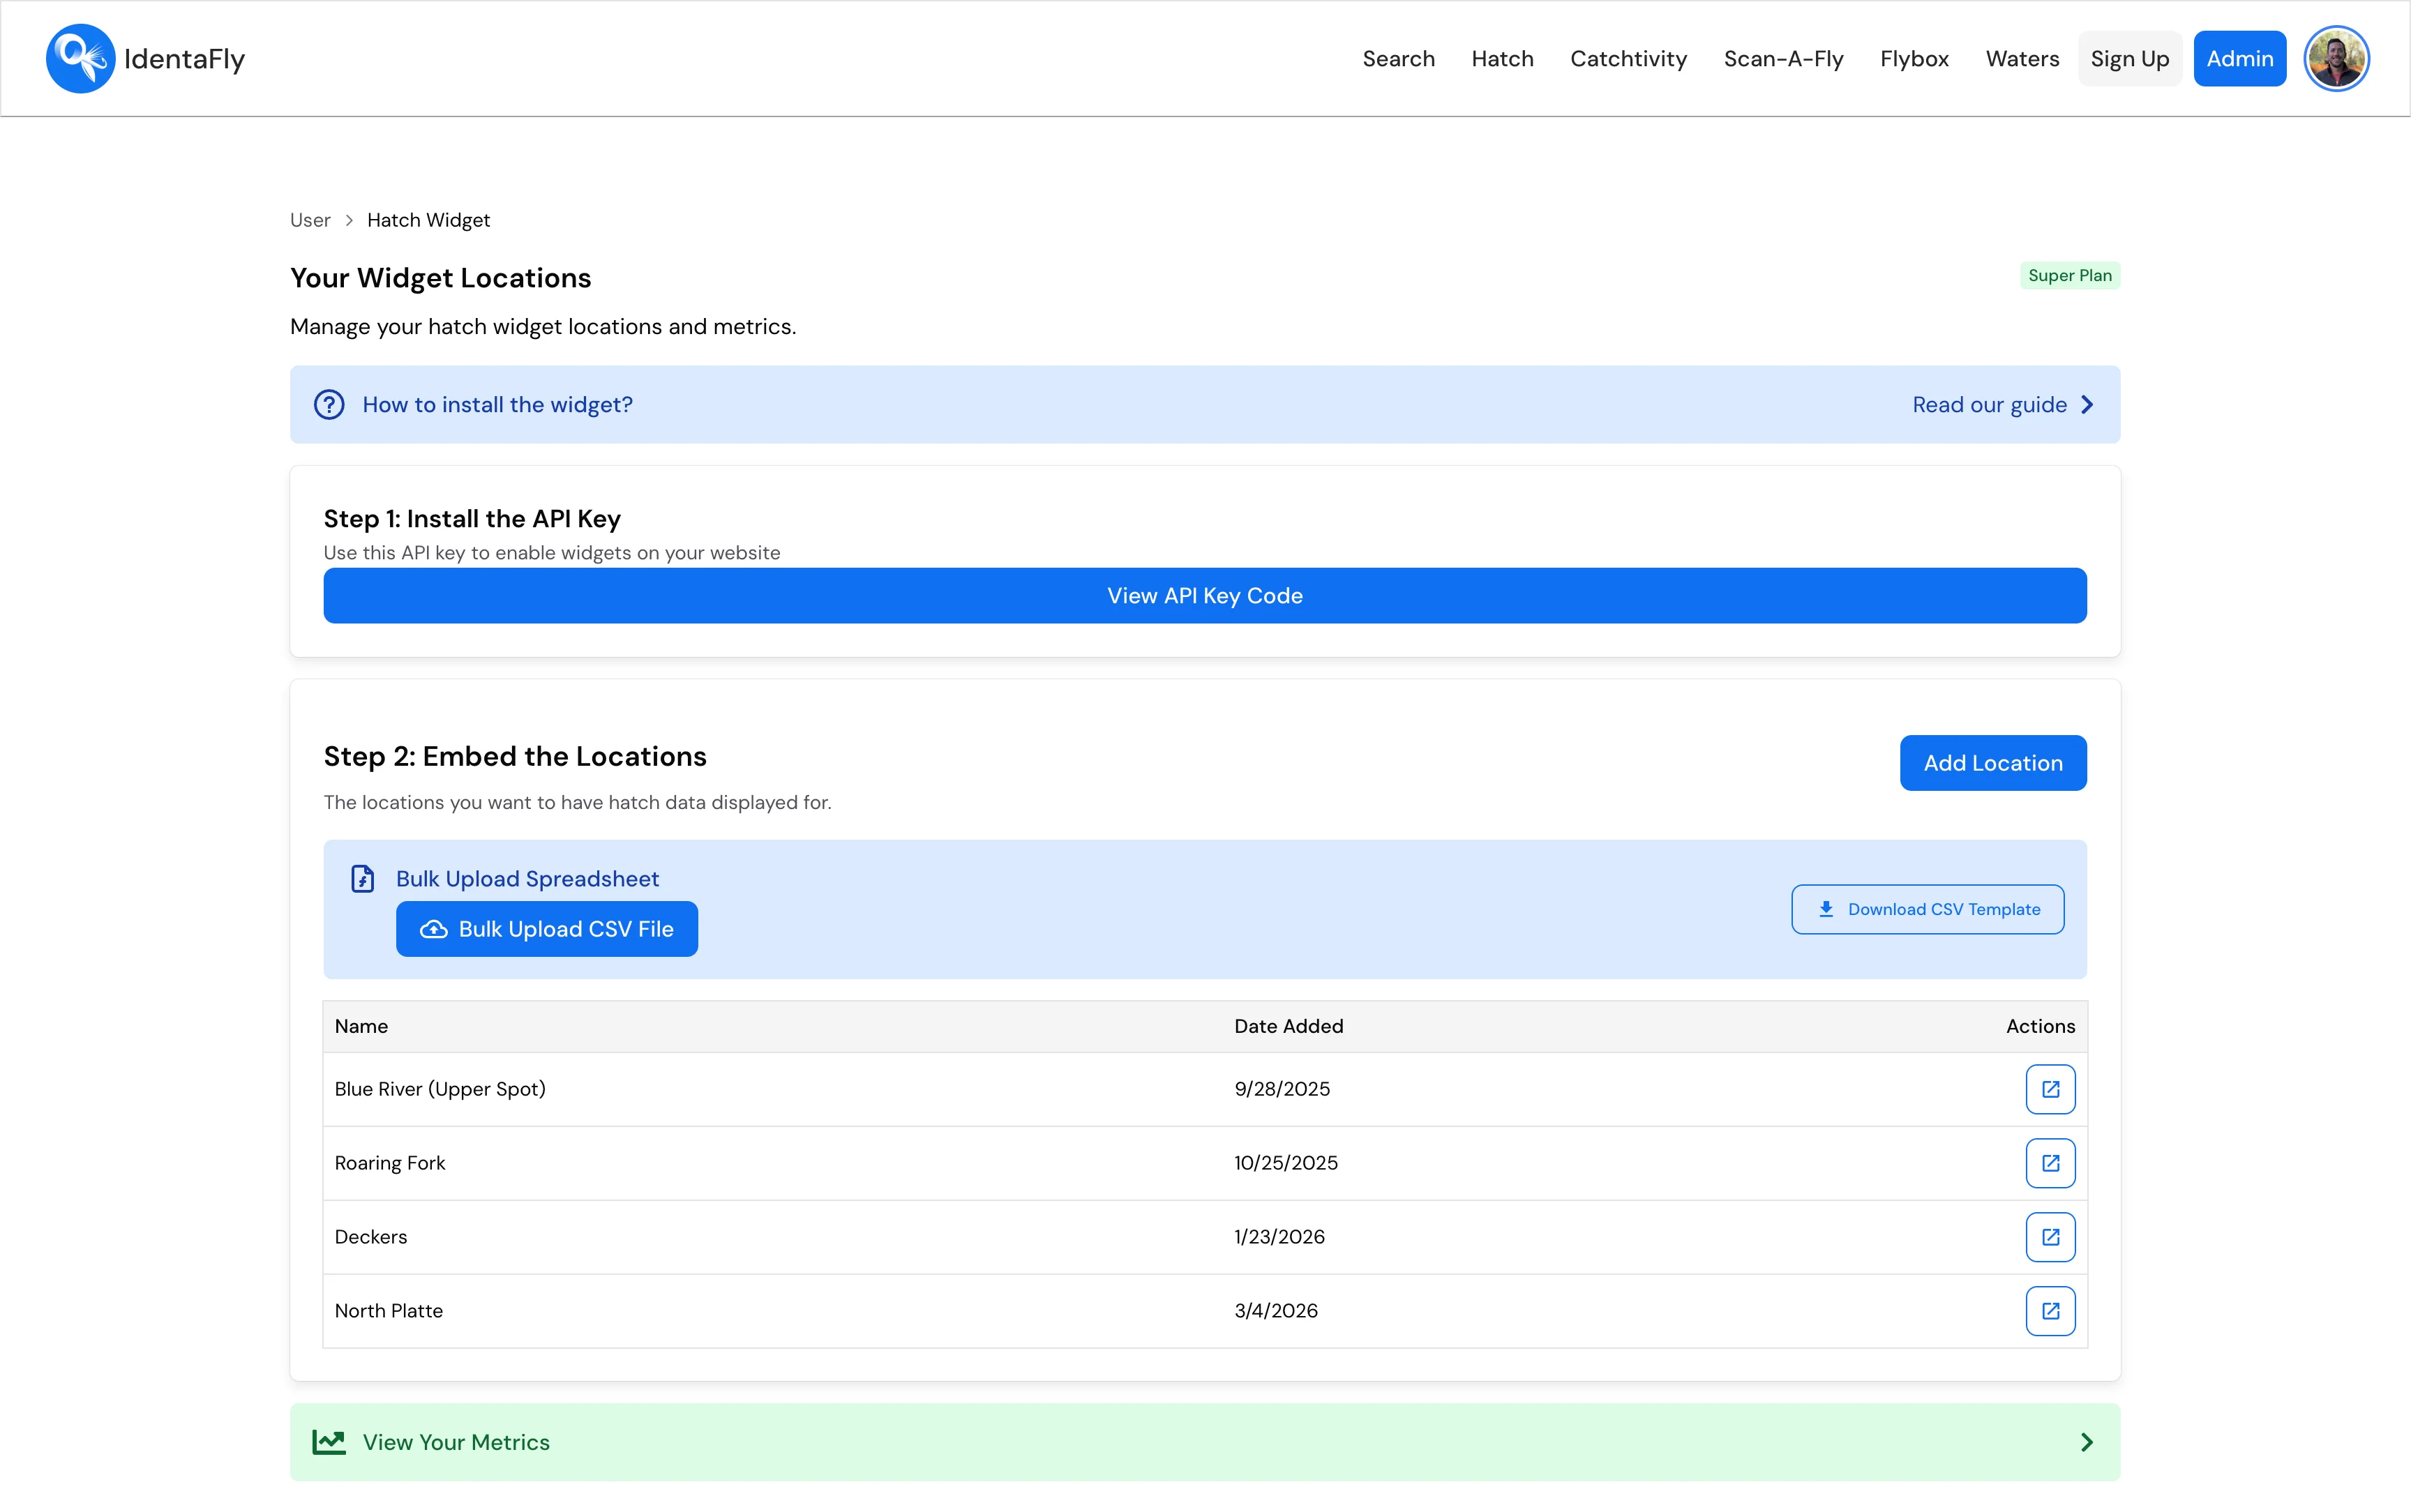
Manage locations & API keys
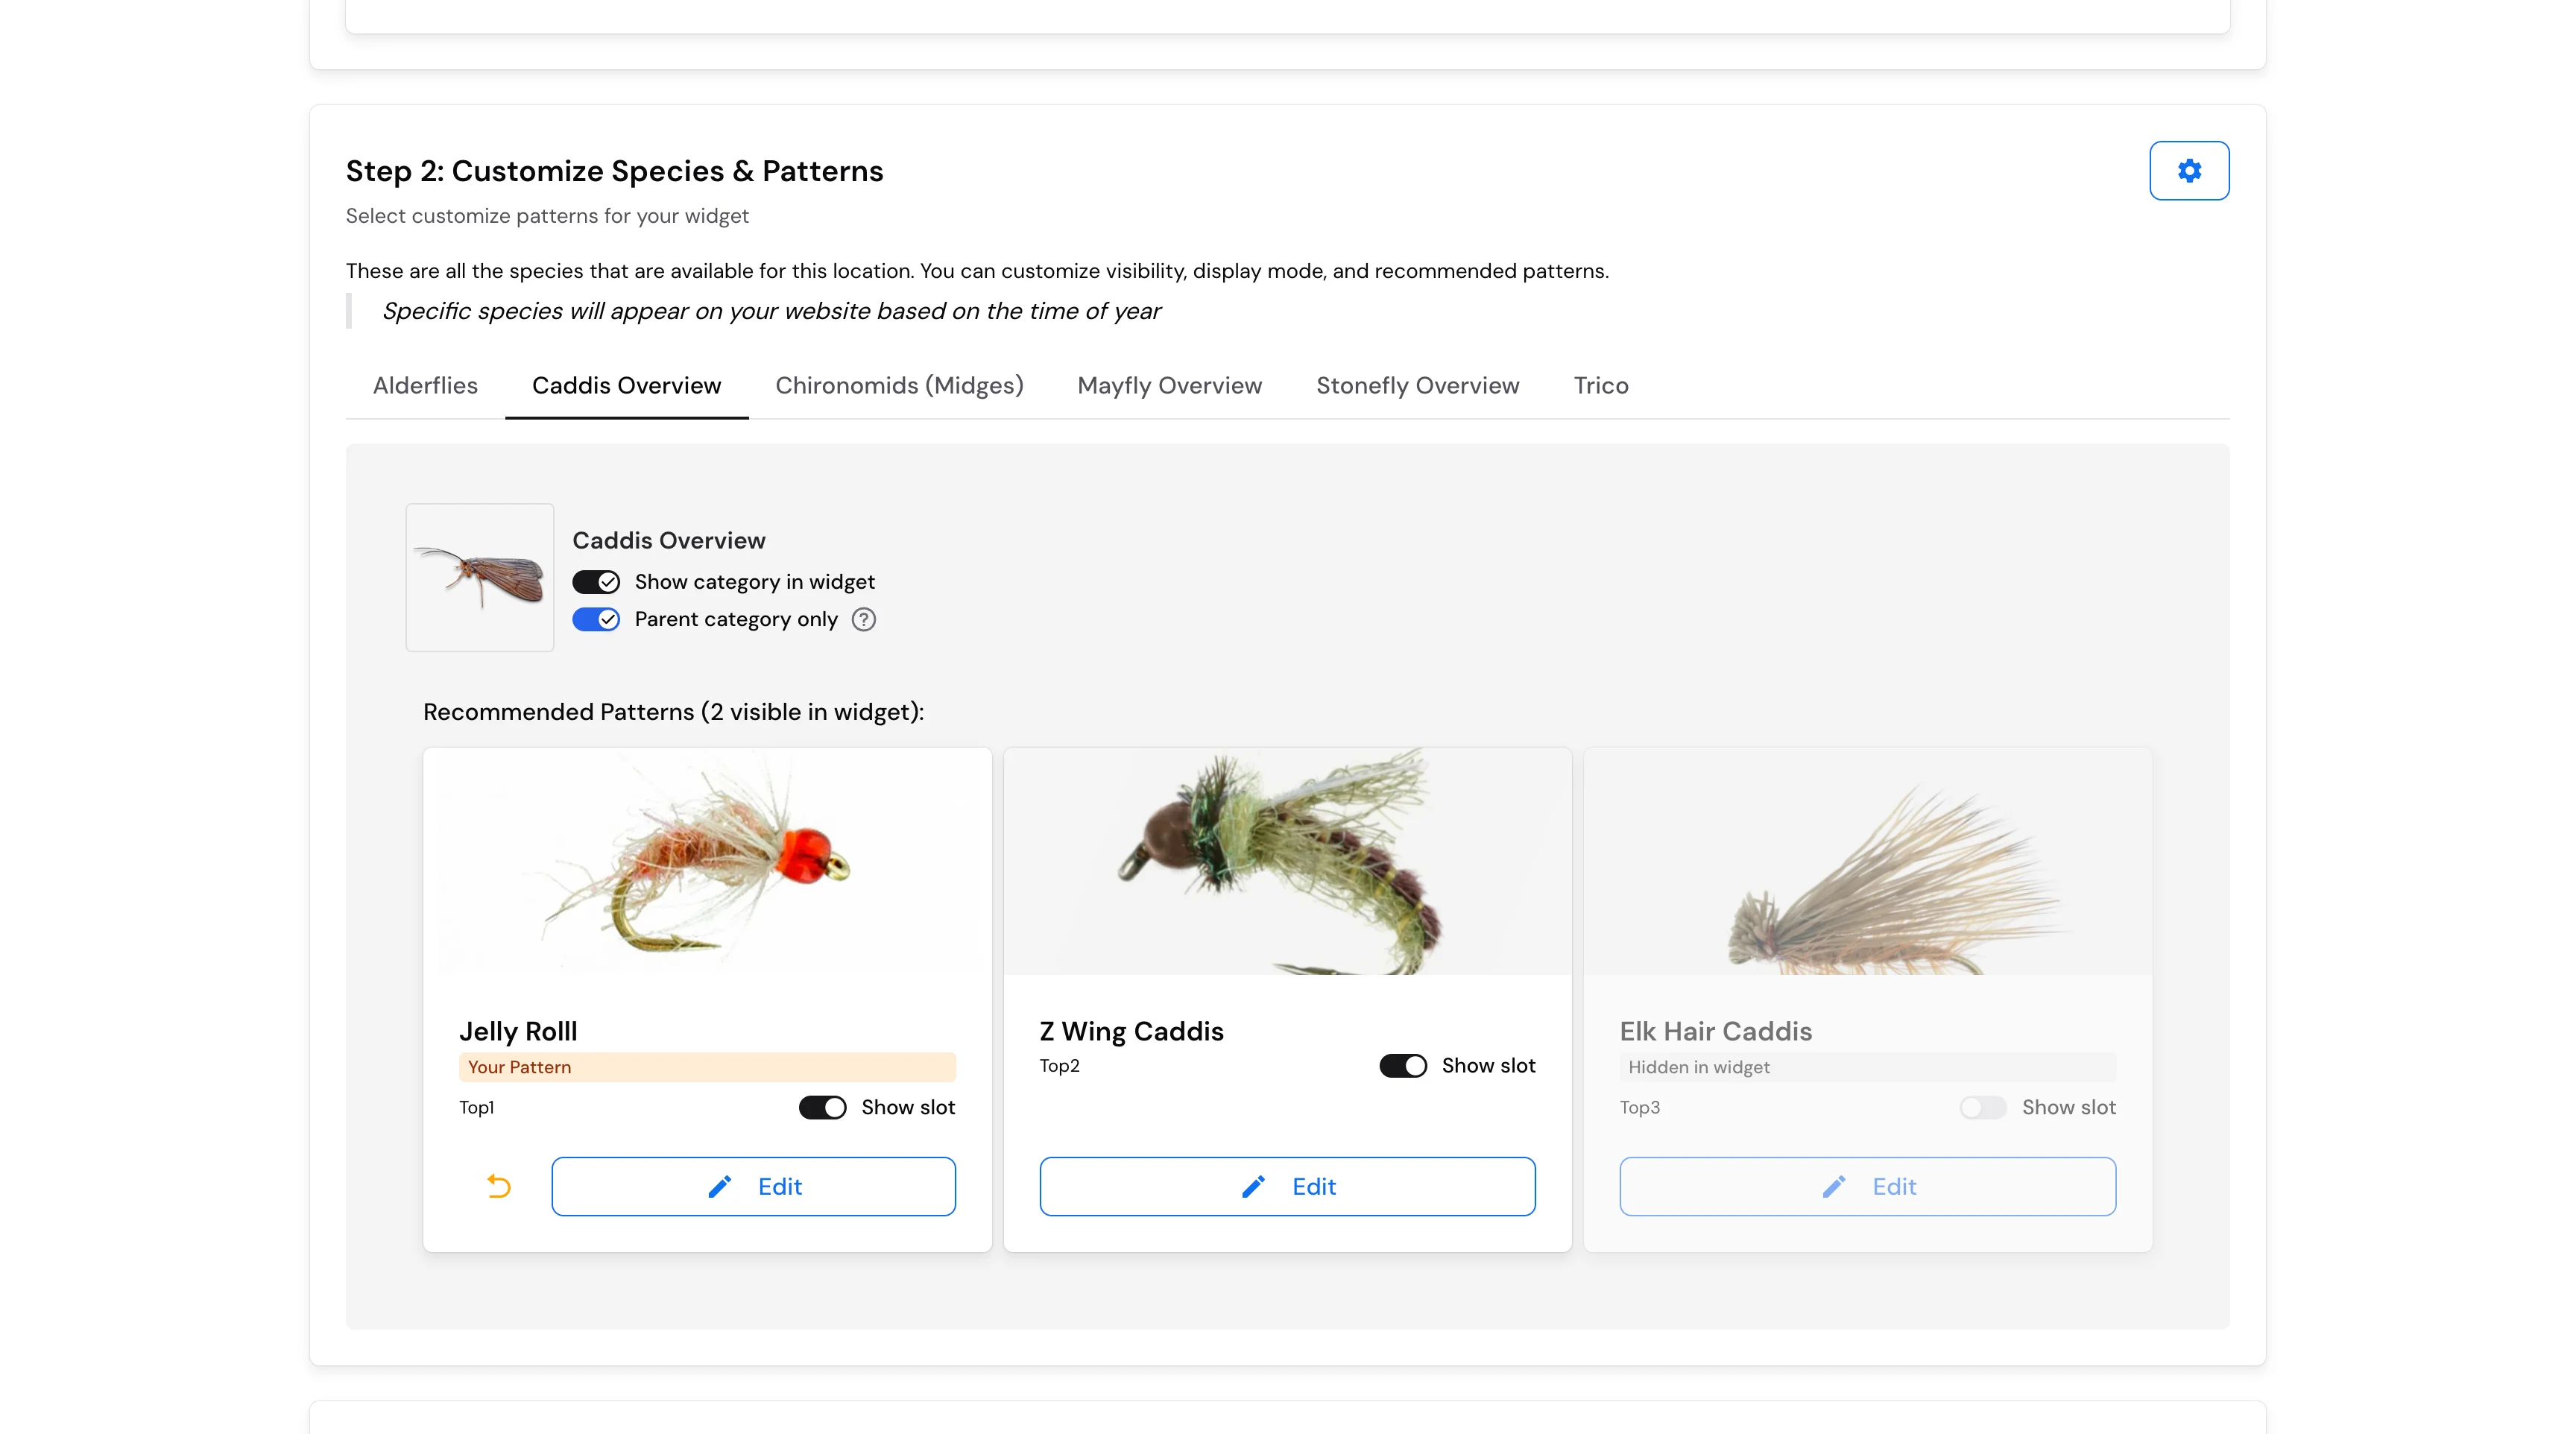
Customize patterns & store links (Plus)
Want to see it in action?
These fly shops and guides already embed the Hatch Widget on their sites. Open a live example to see how it looks for anglers.
Why Add the Hatch Widget?
Increase Website Engagement
Keep anglers exploring longer with live hatch data, water conditions, and fly recommendations — automatically updated for your region.
Educate & Inspire Visitors
Showcase local insect hatches with high-quality photos, lifecycle insights, and top patterns to match — from nymphs to dries.
Drive Sales
Turn every hatch into a purchase path. Link chart results directly to the flies and gear your shop sells.
How It Works
1
Sign in & set up
Create a free IdentaFly account and register your company. We review new accounts before the public embed goes live — you can set up locations while you wait.
2
Add locations & gages
Add your fishing locations and connect nearby USGS gage stations so the chart reflects real water conditions.
3
Customize your widget
Free includes IdentaFly branding. Pro removes the logo. Plus lets you choose fly patterns, add store links, and match your site style.
4
Install & go live
Paste the snippet into your site (WordPress, Squarespace, or any CMS). The chart auto-updates with live data and seasonal forecasts.
Plans Overview
Start free with IdentaFly branding, then upgrade when you are ready.
Compare Plans
| Free | Pro | Plus | |
|---|---|---|---|
Powered By IdentaFly Logo | |||
Links to IdentaFly | |||
All Species | |||
Default Patterns | |||
Custom Patterns | |||
Link to Online Store |
Widget Walkthrough
Watch how to set up locations, customize your widget, and embed it on your site.
How to Add LocationWidget to Your Website
Don't worry, we'll walk you through it step-by-step! Choose your platform below and follow the simple instructions.
Add the Main Snippet to Your Footer
First, copy your unique snippet from the Settings page in your LocationWidget dashboard. Then, add it to your WordPress site footer:
<script
src="https://storage.googleapis.com/widget-hatch/identafly-widget.umd.cjs"
onload="
console.log('Script loaded, initializing widget...');
new window.IdentaflyWidget({ apiKeyId: 'you-api-key-id' });
"
async
>
</script>- Go to Add New Plugin → Search for WPCode. Make sure to activate the plugin.
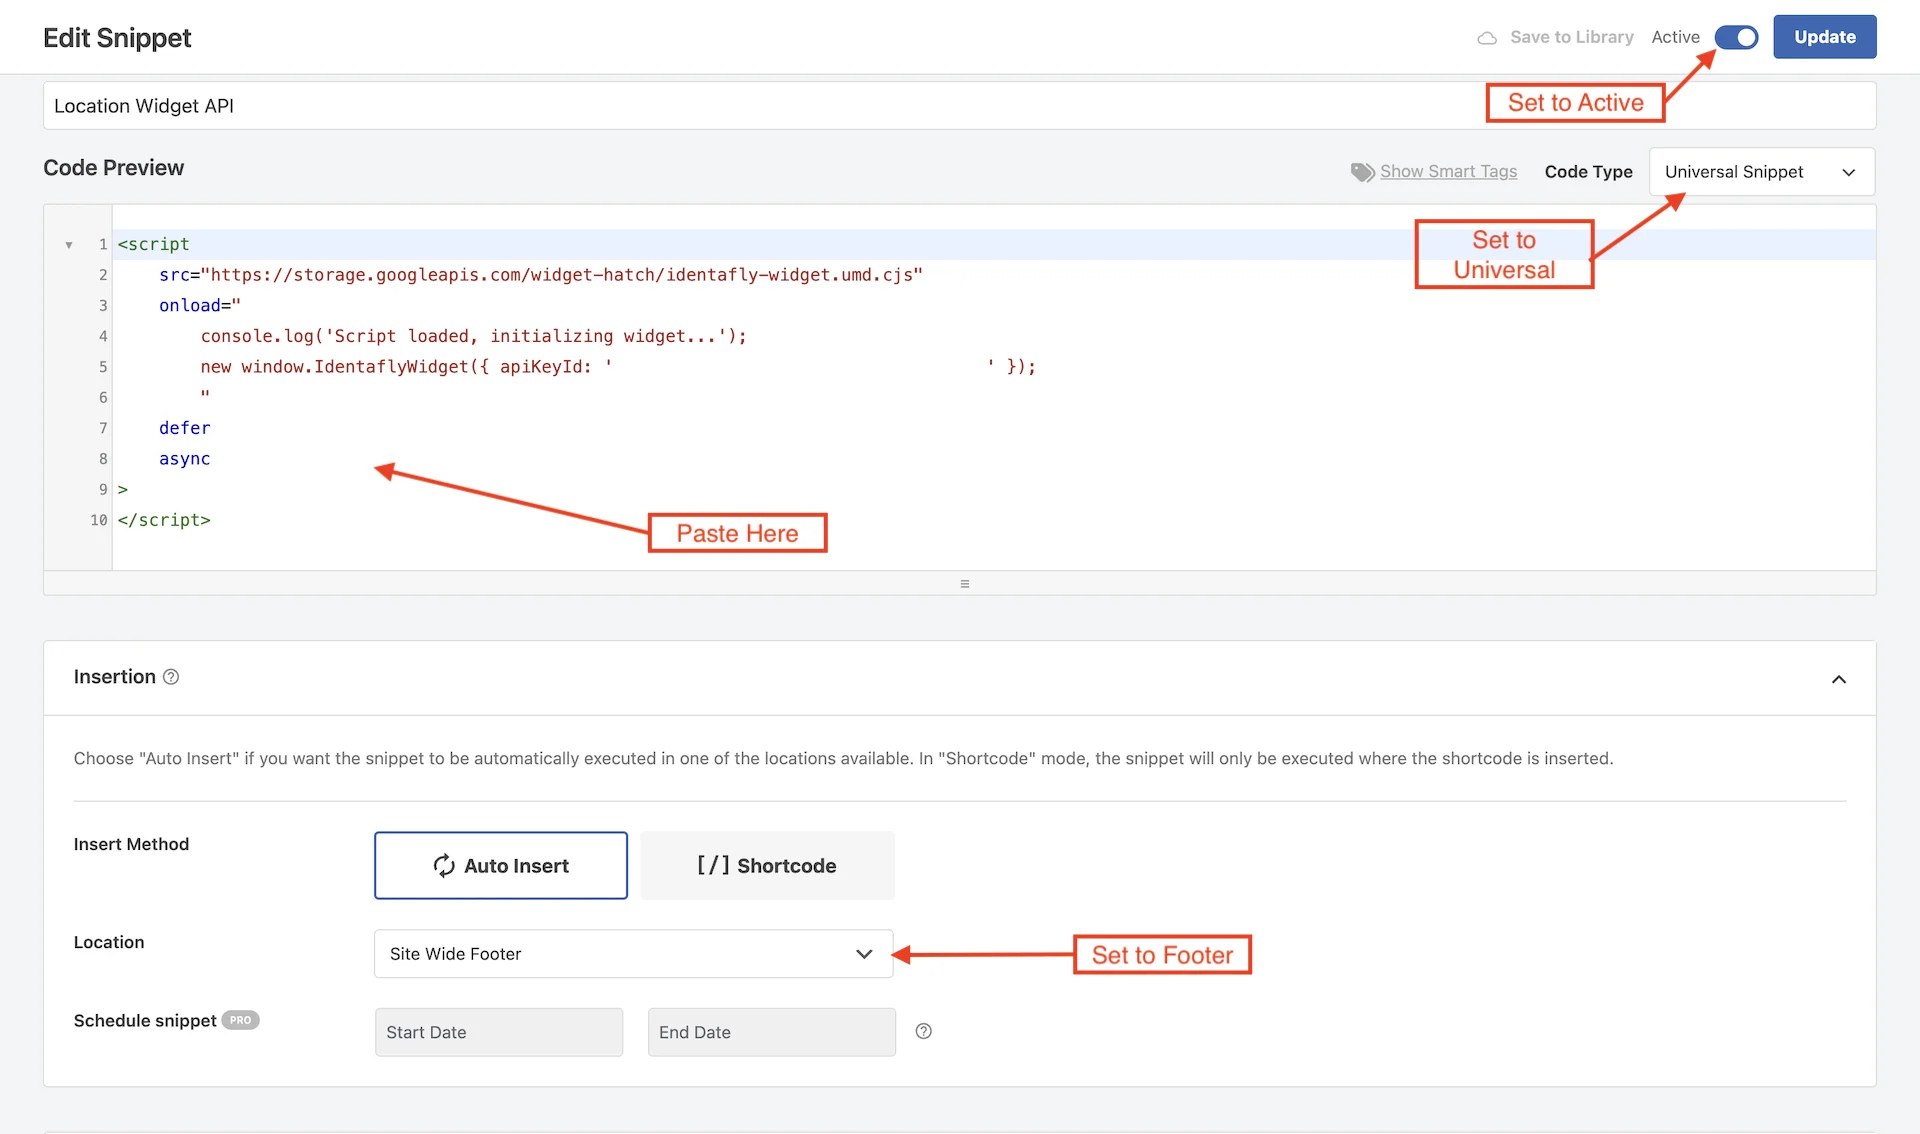
- On the left sidebar, find Code Snippets plugin, and add a new snippet. Make sure to activate the snippet! Fill out the form like so:
- Save this snippet. Now, if you reload your website, you should see a message in the console.
Check out the WordPress file editing guide
Add Location Snippets to Your Pages or Posts
Now let's add your location displays! You can add them to one page with multiple sections, or spread them across different pages.
<div
    id="hatch-chart-your-location-name"
    data-identafly-widget
    data-widget-id="your-widget-id">
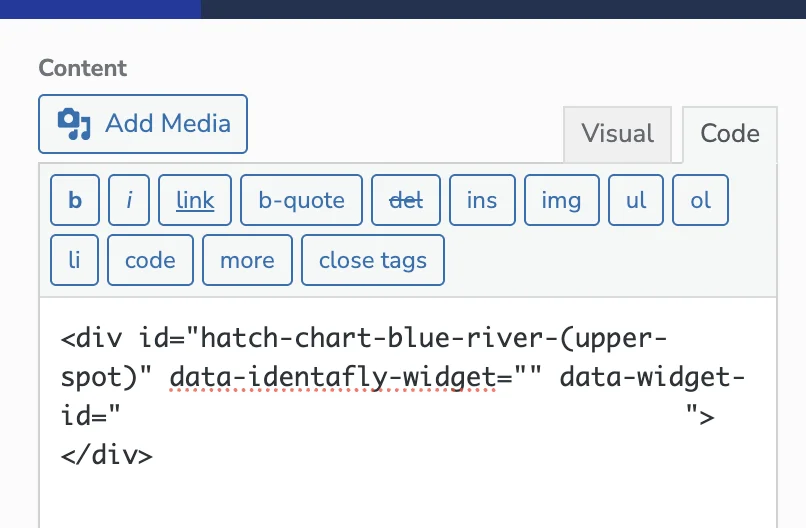
</div>- Edit the page or post where you want the location to appear
- Add a new text block
- Switch to the HTML editor
- Paste your location snippet from your dashboard
- Click Update or Publish
Save Your Changes
- Click Update File or Update in your WordPress admin. You're all set! 🎉
Check If It's Working
Visit your live website and reload the page. Your location widget should be visible!
- Right-click anywhere on your page and choose "Inspect"
- Find and click the Console tab in the developer tools
- Right-click anywhere on your page and choose "Inspect"
- Find and click the Console tab in the developer tools
- Refresh your page
- Look for any red error messages in the console
- See errors? Don't worry! Contact our support team and we'll walk you through it.
Add the Main Snippet to Your Footer
First, copy your unique snippet from the Settings page in your LocationWidget dashboard. Then, add it to your Squarespace site footer:
<script
    src="https://storage.googleapis.com/widget-hatch/identafly-widget.umd.cjs"
    onload="
        console.log('Script loaded, initializing widget...');
        new window.IdentaflyWidget({ apiKeyId: 'you-api-key-id' });
        "
    async
>
</script>- Go to Settings → Advanced → Code Injection
- Scroll to the Footer section
- Paste your snippet in the footer box
- Click Save
Check out the Squarespace Code Injection guide
Add Location Snippets to Your Pages
Now let's add your location displays! You can add them to one page with multiple sections, or spread them across different pages.
<div
    id="hatch-chart-your-location-name"
    data-identafly-widget
    data-widget-id="your-widget-id">
</div>- Edit the page where you want the location to appear
- Click the + button to add a new block
- Search for and select "Code" block
- Paste your location snippet from your dashboard
- Click Apply
Check out the Squarespace Code Blocks guide
Save Your Changes
Click "Save" in the top-left corner of the editor. You're all set! 🎉
Check If It's Working
Visit your live website and reload the page. Your location widget should be visible!
- Right-click anywhere on your page and choose "Inspect"
- Find and click the Console tab in the developer tools
- Right-click anywhere on your page and choose "Inspect"
- Find and click the Console tab in the developer tools
- Refresh your page
- Look for any red error messages in the console
- See errors? Don't worry! Contact our support team and we'll walk you through it.
Add the Main Snippet to Your Footer
First, copy your unique snippet from the Settings page in your LocationWidget dashboard. Then, add it to your HTML file just before the closing </body> tag:
<script
    src="https://storage.googleapis.com/widget-hatch/identafly-widget.umd.cjs"
    onload="
        console.log('Script loaded, initializing widget...');
        new window.IdentaflyWidget({ apiKeyId: 'you-api-key-id' });
        "
    async
>
</script>- Open your main HTML file (often
index.html) - Scroll to the bottom and find the
</body>tag - Paste your snippet right before it
- If you're using a template engine (EJS, Handlebars, etc.), add it to your main layout/footer file
We can even support custom websites, just contact us about an NPM package you can install.
Add Location Snippets to Your Sections
Now add your location displays wherever you want them! You can have multiple locations on one page or across different pages.
<div
    id="hatch-chart-your-location-name"
    data-identafly-widget
    data-widget-id="your-widget-id">
</div>- Open the HTML file where you want the location to appear
- Find the section/div where you want the widget displayed
- Paste your location snippet from your dashboard
- Each location has a unique ID, so you can add as many as you need!
Save Your Changes
Save your HTML file and upload it to your web server. That's it! 🎉
npm run build).Reload Your Website and Test
Visit your live website and reload the page. Your location widget should appear!
- Right-click on your page and select "Inspect" or "Inspect Element"
- Navigate to the Console tab in the developer tools
- Refresh the page (F5 or Cmd+R)
- Check for any error messages in the console
- Common issues:
- Make sure the main script is loaded before the location snippets
- Verify your API key is correct
- Check that your location IDs match those in your dashboard
- Still having trouble? Contact our support team - we're happy to help!
Take it one step at a time.